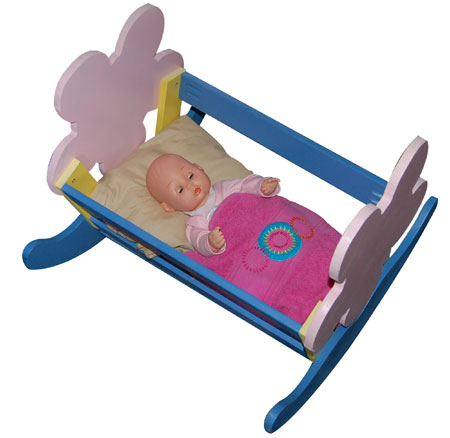
Rocking cradle for a baby doll
Posted by jasonmain in Project Plans
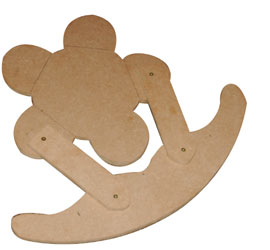
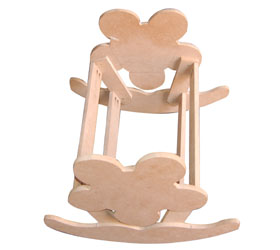
This is a rocking crib and it only took a couple of hours to make and then paint. It’s not a difficult design, but does look lovely once finished.

You will need:
- 12mm PG Bison SupaWood cut to the sections as shown below*
- Pockethole jig
- 20mm wood screws
- Drill/Driver and assorted bits
- Countersink bit
- Wood glue
- Orbital sander with 220-grit sanding pads
- Rust-Oleum 2X spray paint in your choice of colours
- Acrylic PVA for primer/base coat
- Paintbrush
* I’m not providing measurements – you can make this design as large or a small as you wish, depending upon the size of the doll, and it is pretty straightforward and simple.
Here’s how:
Step 1
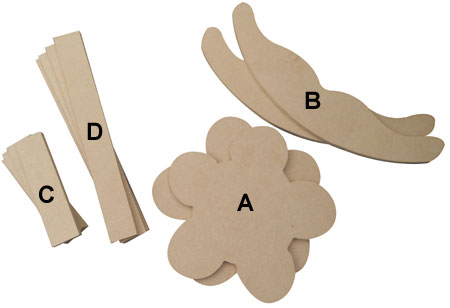
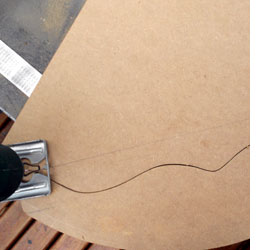
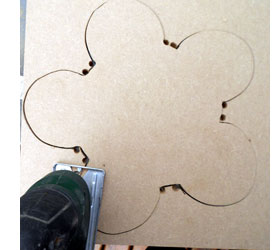
Draw all the designs shown onto a piece of 12mm PG Bison SupaWood and then use a jigsaw to cut out.
Step 2
Sand all the edges smooth with 220-grit sandpaper.
GOOD TO KNOW
Use household items as templates for the shape. This can be anything from teacups to dinner plates.
Drill 10mm holes with a wood bit if you need to get into tight corners and be sure to use a thinner fret saw bit with your jigsaw.
Step 3
Assemble the two end sections as shown left.
Drill 2mm pilot holes and countersink all holes before screwing the sections together.
Remember to wipe away any wood glue before it has chance to dry.
Step 4
Attach the side sections as shown right. I used a pockethole jig to do this, but if you don’t have a pockethole jig, use dowel joints as a substitute.
Step 5
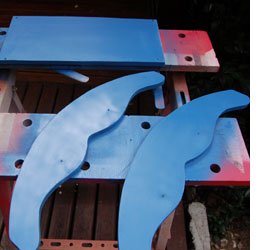
Disassemble everything and give one coat of acrylic PVA. Once dry, sand with 220-grit sandpaper to remove any brush strokes.
Step 6
Spray a light coat of spray paint in your choice of colour and let this dry before applying a second coat.
Once dry, re-assemble the pieces together.
![]()
Comments
Add comment