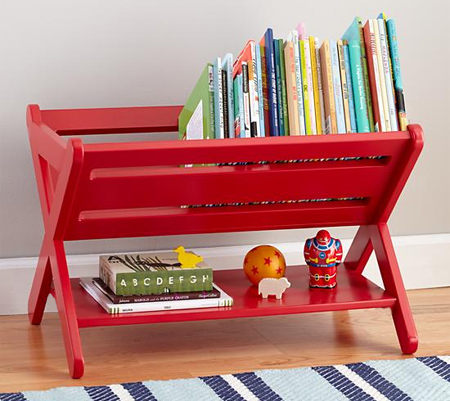
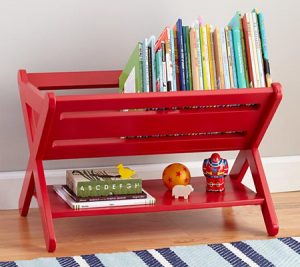
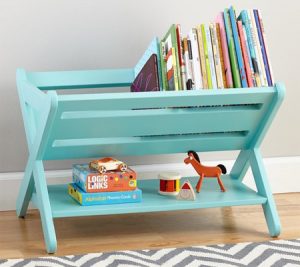
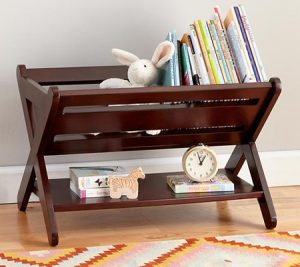
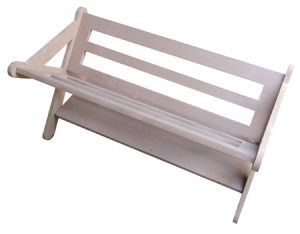
Make A Kiddies Book Caddy Or Storage Shelf
Posted by Odette Nieuwoudt in Project Plans
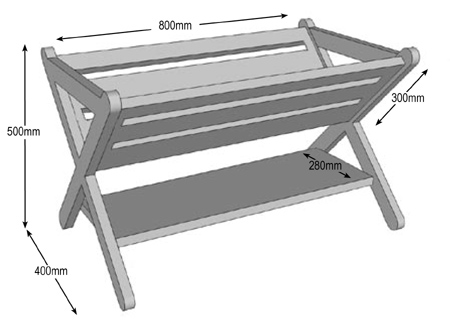
This book caddy retail at around R1200 if you had to buy them ready made. Make your own and it will cost you nothing if you use any offcuts lying around, or R600 for a sheet of 16mm PG Bison SupaWood and you can then make 3 or 4 units from one sheet. You can buy a sheet of SupaWood at your local Builders Warehouse and have them cut it to sizes for you.
![]()
- 2 of 16mm SupaWood 400 x 500mm – sides
- 2 of 16mm SupaWood 300 x 800mm – panels
- 1 of 16mm SupaWood 280 x 800mm – shelf
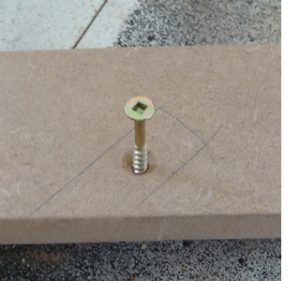
- of 3.5 x 30mm wood screws
- Wood filler
- Rust-Oleum 2X in your choice of colour
- 120- and 240-grit sanding pads
TOOLS:
- Drill/Driver plus assorted bits
- Countersink bit
- Jigsaw and clean-cut blade
- Sander
- Tape measure and pencil
- Steel rule or straightedge
![]()
1. Cut out the panels as shown below. The cut outs are 50mm wide and 700mm long.

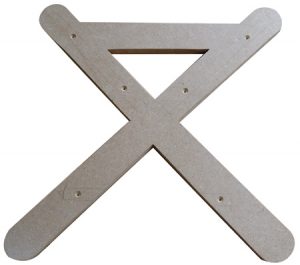
2. Cut out the sides as shown below. Each section is 50mm wide and the corners are nicely rounded off.
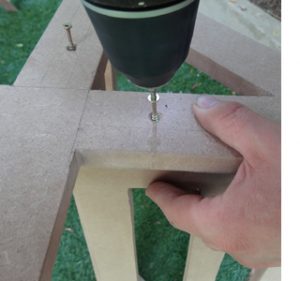
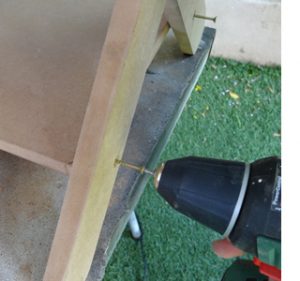
3. On the side and panels are cut, you will place the panels onto the sides and use a pencil to mark where the panels will be placed. This allows you to pre-drill 3mm pilot holes and countersink ready for assembly.
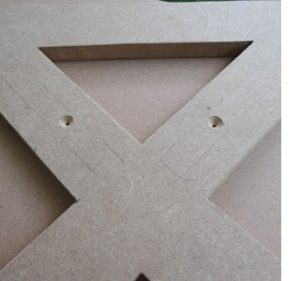
Here’s a close up of the sides showing the pencil marks where the panels and shelf will be mounted. By doing this you can accurately gauge where to drill the 3mm pilot holes.
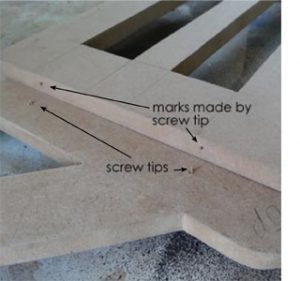
4. On the sides, insert the screws so that just the tip is showing on the back side. Using the drawn lines as a guide, place one end of a panel into place and press down. The screw tips act in the same way as a dowel centre would, by making a mark on the edge of the panels to indicate where you need to drill a 3mm pilot hole.
5. Repeat the above step so that you know where to drill 3mm pilot holes to mount the shelf.
6. Secure the panels to the one side, and the shelf to the sides using 3.5 x 30mm wood screws. Cover the holes up with wood filler and leave this to dry.
7. With one side attached you can repeat the process to make marks and drill 3mm pilot holes on the other end of the panels.
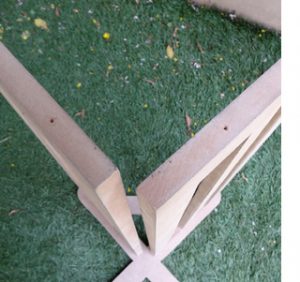
Secure the remaining side to the panels.
Here you can see how the sides are panels look once joined together.
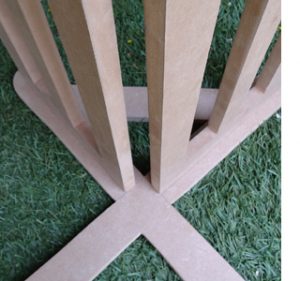
8. Lastly, attach the shelf in place using 3.5 x 30mm wood screws and fill the holes with wood filler.
Finishing
Sand the entire project with 120-grit sanding pads if there are any uneven edges and then sand with 240-grit sanding pads to smooth and polish the cut edges before painting. To reduce the amount of spray paint required, I now apply a coat of white acrylic PVA (Plascon Polvin) to my pieces as a base coat. Once dry, this is sanded smooth with 240-grit sandpaper and wiped clean before spraying. This cuts down on the amount of paint absorbed into the SupaWood and means you use far less paint.
![]()
Comments
Add comment