Mastering Joinery Techniques with a Table Saw: A Comprehensive Guide
Posted by Siphesihle Hato in Encyclopedia of Woodworking
 Joinery, the art of connecting wood pieces securely and seamlessly, is a fundamental skill in woodworking. While there are various tools and techniques for joinery, executing it with a table saw offers precision, efficiency, and versatility. Whether you’re a novice or a seasoned woodworker, mastering joinery with a table saw can significantly enhance the quality of your projects. Here’s a comprehensive guide on how to execute joinery with a table saw effectively.

- Selecting the Right Blade and Setup:
Begin by choosing the appropriate blade for the type of joinery you’re aiming to achieve. For most joinery cuts, a carbide-tipped combination blade or a specialized dado blade set is ideal. Ensure the blade is sharp and properly aligned with the table saw’s fence and miter gauge for accurate cuts.
- Proper Measurement and Marking:
Accurate measurements are crucial for successful joinery. Use a combination square, marking gauge, or measuring tape to mark the precise locations for cuts on your workpieces. Double-check measurements to avoid errors that could compromise the fit of your joints.
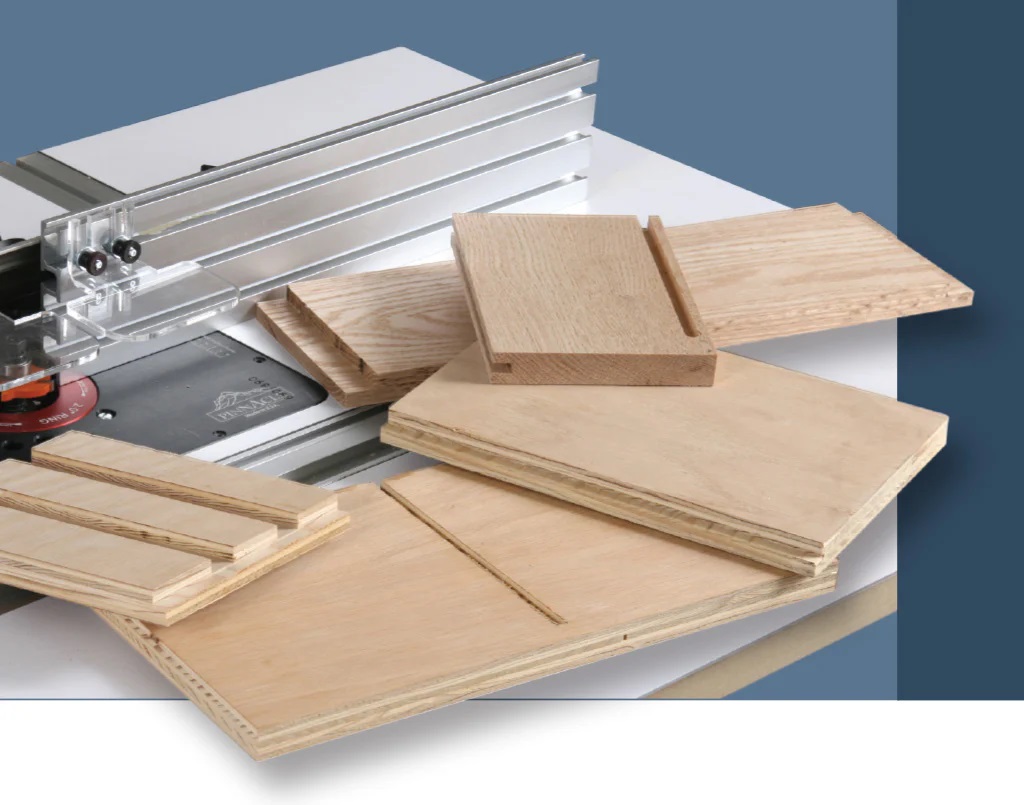
- Cutting Dadoes and Rabbets:
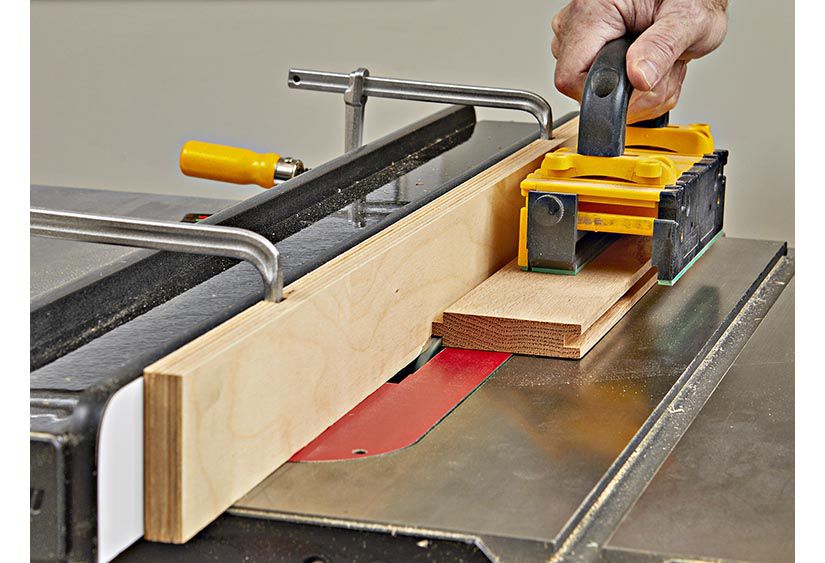
Dadoes and rabbets are common joinery techniques used for creating slots or recesses to fit adjoining pieces. To cut dadoes, adjust the blade height and fence position to the desired width of the groove. Use a push stick and feather boards to guide the workpiece safely through the cut, making multiple passes if necessary for wider dadoes.
- Crafting Tenons and Mortises:
Tenons and mortises form strong, interlocking joints commonly found in furniture and cabinetry. Start by cutting the tenons on the end of one workpiece, adjusting the blade height and fence to achieve the desired thickness. Then, cut the corresponding mortises on the mating piece using a dado blade or by making multiple passes with a standard blade.

- Creating Dovetails and Box Joints:
Dovetails and box joints are classic joinery techniques known for their strength and decorative appeal. Utilize a specialized dovetail or box joint jig along with your table saw to guide the cuts accurately. Adjust the blade height and spacing according to the specifications of your chosen joint pattern, and make precise cuts to create tight-fitting joints.
- Finishing and Assembly:
After cutting the joinery, dry-fit the pieces together to ensure proper alignment and fit. Make any necessary adjustments before applying glue and clamping the joints securely. Once the glue has dried, sand the joints smooth to achieve a seamless finish.
Mastering joinery with a table saw opens up a world of possibilities for creating intricate, high-quality woodworking projects. By following these techniques and practicing precision and patience, woodworkers can achieve professional results and elevate their craftsmanship to new heights.
Comments
Add comment