
Getting the Basics Right: 5 Traditional Woodworking Joints You Can Learn This Weekend
Posted by Siphesihle Hato in Uncategorized
 It takes skill to master a variety of skills, such as putting pieces of wood together, in the age-old craft of woodworking. Power tools can speed up and improve the accuracy of the operation, but it’s still important to comprehend the fundamentals. In this post, we’ll look at five basic woodworking joints that you can learn to make by hand to improve your woodworking abilities and produce stunning, durable creations.
 The butt joint is the simplest and most fundamental type of woodworking joint. It entails creating a straight angle by attaching the end of one piece of wood to the face or edge of another. Cut the wood precisely to size, making sure the edges are clean and square, to make a butt joint. Apply woodworking glue to the surfaces of the joints, position the pieces, and clamp them together while the glue cures. Adding screws or nails to the joint’s reinforcement increases its strength. Although a butt joint is simple, accurate alignment and the use of adhesive are essential for a reliable connection.
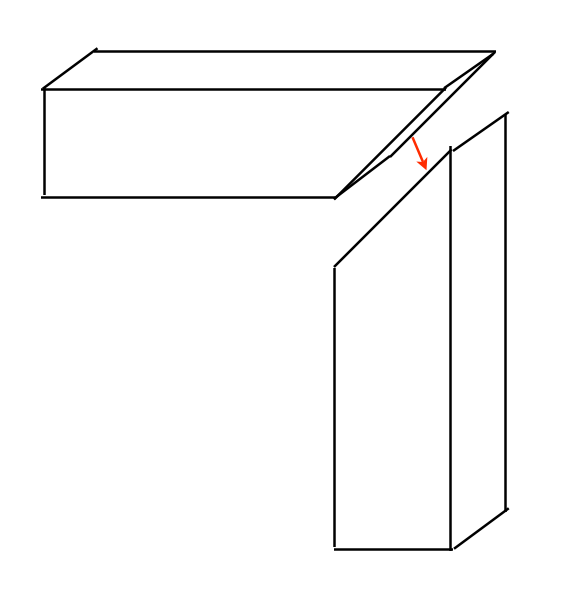 The Mitre Joint: The miter joint is frequently employed to produce smooth, uniform corners, such as those found in molding or picture frames. Two pieces of wood are joined together at a 45-degree angle at this joint. To build a miter joint by hand, first measure and mark the angle on the wood. Then, using a hand saw or miter box, carefully cut along the defined line. Sand or plane the cut edges until they are completely aligned to ensure a snug fit. Utilize tape or clamps to hold the parts together while the glue cures on the mitered surfaces.
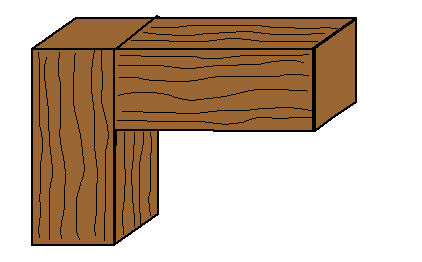
 A dado joint is used to make a groove or channel in one piece of wood so that another piece can fit within. This connection is frequently utilized in the building of bookcases, cabinets, and drawers. Mark the width and depth of the groove on the wood to create a dado joint by hand. Carefully cut along the marked lines with a chisel or dado plane. Apply adhesive to the joint surfaces after making sure the fit is precise. Clamps or brads can be used to hold the pieces together while the glue cures. Your woodworking projects will be strong and stable thanks to a well made dado joint.
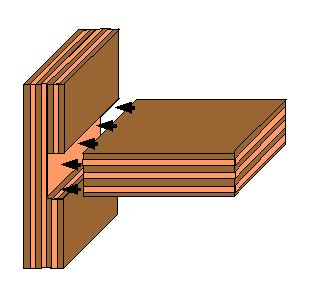
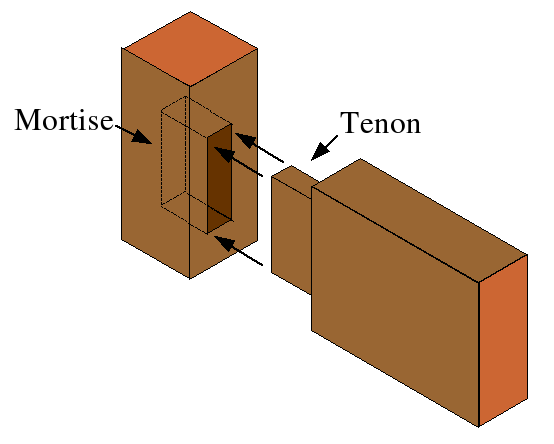 Mortise and Tenon Joint: Making a right-angle connection between two pieces of wood using a mortise and tenon joint is a strong and dependable technique. It entails sculpting a corresponding protrusion (tenon) on one piece and cutting a square or rectangular hole (mortise) in one piece. Mark, carefully cut, and shape the tenon with a chisel and saw to make a mortise and tenon joint by hand. Apply woodworking glue to the joint surfaces after making sure the joint is a tight fit. While the adhesive is curing, clamp the pieces together to create a strong and attractive junction.

Dovetail joints: This traditional woodworking junction is renowned for its durability, beauty, and resistance to pulling forces. A secure connection is made by interlocking trapezoidal pins and tails. Even though hand-made dovetail joints require accuracy and skill, the end product is well worth the work. To ensure that the pins and tails fit firmly together, use a dovetail saw or coping saw to cut them with care. Apply glue to the joint surfaces before assembling the parts. Clamps should be used to keep the components in place while the glue cures. Dovetail joints are frequently utilized in the building of drawers and exquisite furniture.
For any woodworker, mastering simple hand joints is a necessary skill. Whether you’re a novice or an expert artisan, knowing how to make these basic joints will help you produce
Comments
Add comment