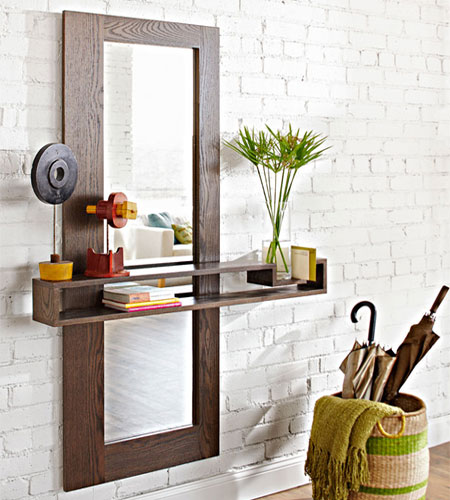
Framed mirror for hallway or entrance
Dress up a hallway or entrance with a modern-look mirror and floating shelf. You can use PG Bison SupaWood, pine or plywood for this weekend project.
You will need:
CUTTING LIST:
- 1 of 19mm x 90mm x 1670mm – Frame
- 1 of 19mm x 90mm x 375mm – Frame
- 1 of 19mm x 140mm x 1670mm – Frame
- 1 of 19mm x 140mm x 375mm – Frame
- 1 of 4 mm x 550mm x 1620mm – Back
- 1 of 4 mm x 44mm x 1480mm – Back
- 1 of 4 mm x 44mm x 550mm – Back
- 1 of 4 mm x 95mm x 1480mm – Back
- 1 of 4 mm x 95mm x 550mm – Back
- 1 of 19mm x 140mm x 860mm – Shelf
- 1 of 19mm x 140mm x 120mm – Shelf
- 2 of 19mm x 140mm x 100mm – Shelf
- 2 of 19mm x 140mm x 50mm – Shelf
- 1 of 19mm x 140mm x 165mm – Shelf
- 1 of 19mm x 140mm x 1100mm – Shelf
TOOLS & MATERIALS:
- Mitre saw or mitre box and backsaw – you can also use a jigsaw to cut corners
- Drill/Driver with assorted bits and countersink bit
- Random-orbit sander with 120- and 220-grit sanding discs
- Carpenter’s square
- Bar clamps
- 76mm wood screws
- 40mm wood screws
- Wood glue
- Mirror adhesive
- Woodoc ebony gel stain
- Woodoc antique wax or Woodoc 10 interior sealer
- Paint brush
- 400 x 1470mm mirror
- Plastic screw caps
- 4mm spacers
- 19mm spacers
- Picture hangers
- Silicone or rubber bumper pads
*Have all sections cut to size at your local Builders Warehouse.
Here’s how:
Step 1
Assemble the frame Drawing 1) using glue and clamps.
Step 2
When the glue is dry, sand the mirror frame with 120-grit followed by 220-grit sandpaper.
Step 3
Sand the hardboard with 120-grit sandpaper to roughen the surface; glue the filler strips around the perimeter of the back with the edges flush.
Step 4
Use a mirror adhesive to secure the mirror into the recess created by the back assembly filler strips.
Step 5
Start building the floating shelf by sanding each component with 120-grit followed by 220-grit sandpaper prior to assembly.
Step 6
Glue and clamp an end L and a hanger M to the top J and short top K (Drawing 2). Drill pilot holes and countersink screws. After assembly you can pop on plastic screw caps to hide screws.
Step 7
Flip the shelf assemblies upside down on your work surface and join the two shelf/end assemblies together by attaching the trough to the hangers. Drive screws through the trough into the hangers. Pop on screw covers.
Step 8
With just the bottom O remaining to complete the shelf, measure and cut the bottom to fit by measuring the overall assembly length. Secure the bottom to the ends with screws.
Step 9:
Clamp the assembled shelf in position where shown (Drawing 3) and drill 4mm pilot holes 76mm deep through the frame, into the shelf. Temporarily drive the screws in. You can use a piece of masking tape wrapped around the drill bit to indicate the drilling depth.
Finishing and Final Assembly
Remove the shelf and finish sand all of the parts. Remove dust with a slightly damp cloth and apply a wood stain of your choice with a foam brush; wipe off excess with a rag. Allow the stain to dry. Apply a clear finish, this can be antique wax or Woodoc 10 sealer, following the manufacturing instructions. Apply three coats; lightly sand between coats with Woodoc steel wool.
When the finish is complete, secure the mirror back in position, centering the back assembly on the frame. Secure with19mm screws. Do not drive any screws along the top of the back. Using the four 4mm pilot holes drilled earlier, start driving the screws that hold the shelf through the stiles A and C so they project 20mm from the face. Slip both a 4mm* and 19mm* spacer over each screw and position the shelf. Drive one screw from each stile into the shelf. With the shelf secured by the two screws, the remaining screws should spin right into the existing holes.
*In the absence of purchased spacers, substitute with washers.


Comments
Add comment