Flattening Your Workbench Top with a Router: A Step-by-Step Guide
Posted by Siphesihle Hato in How To Guides
A flat workbench is essential for precise woodworking tasks. Over time, even the sturdiest benches can develop uneven surfaces due to wear, humidity, or construction imperfections. Fortunately, you can restore a perfectly flat surface using a router and a simple jig. This method is accessible to most woodworkers and doesn’t require specialized equipment.
Understanding the Router Sled Method
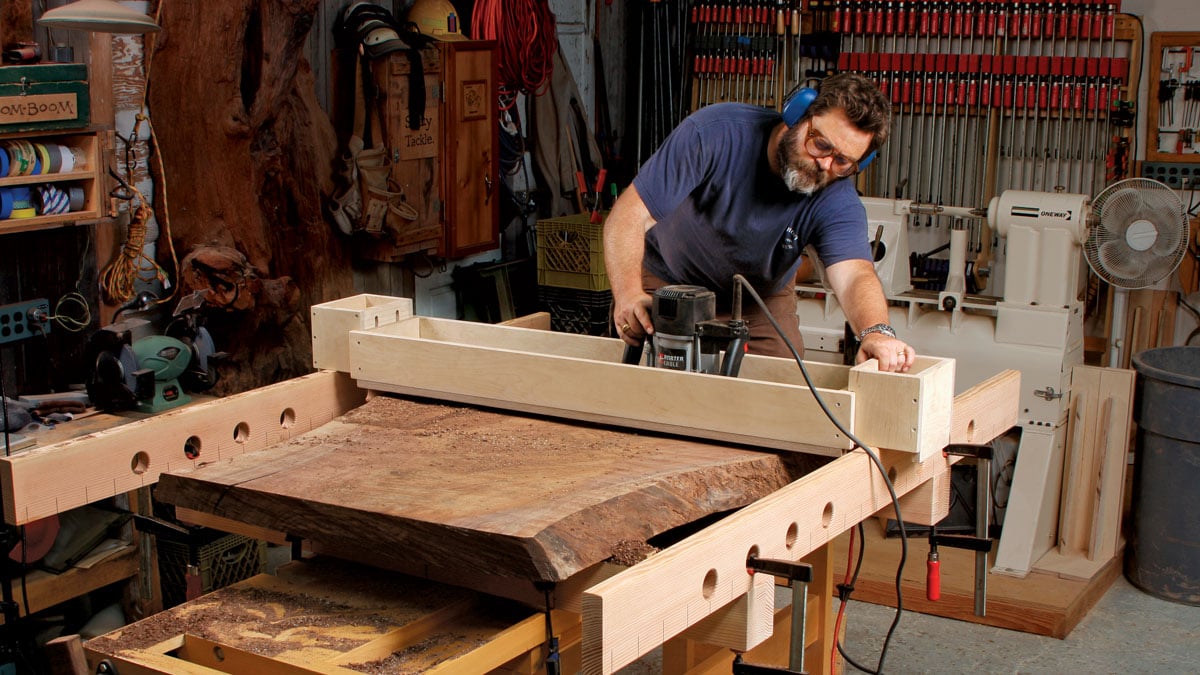
The router sled technique involves mounting a router onto a sled that moves across two parallel guide rails attached to the sides of your workbench. This setup allows the router to traverse the entire surface, removing high spots and creating a uniformly flat top.
Materials and Tools Needed
- Router: Preferably a plunge router for depth control.
- Straight router bit: A wide, flat bit (e.g., 25–38 mm) for efficient material removal.
- Plywood or MDF: For constructing the sled and guide rails.
- Screws and washers: For securing components.
- Shims: Thin pieces of wood or cardboard for leveling.
- Measuring tools: Straightedge, level, and string for alignment checks.
- Clamps: To secure the sled and rails during operation

Step-by-Step Instructions
- Construct the Guide Rails
- Cut two straight, sturdy boards (e.g., 2x4s) to the length of your workbench.
- Attach them to the sides of the bench using screws and washers, allowing for height adjustments.
- Drill oversized holes in the rails to accommodate fine-tuning with shims.
- Level the Guide Rails
- Use a taut string stretched diagonally across the rails to check for twist.
- Adjust the rails using shims until the strings just touch at the center, indicating a flat plane.
- Build the Router Sled
- Create a flat base from plywood or MDF, wide enough to span the guide rails.
- Attach side walls to the base to prevent the router from tipping.
- Mount the router securely in the center of the sled, ensuring the bit can reach the workbench surface.
- Prepare the Workbench Surface
- Remove any hardware or obstructions from the benchtop.
- Clean the surface thoroughly.
- Mark any particularly high or low spots for reference.
- Begin Flattening
- Set the router bit to remove a small amount of material (e.g., 1 mm).
- Move the sled back and forth across the bench, overlapping each pass slightly.
- After completing one pass, adjust the sled to the next section and repeat.
- Continue until the entire surface is uniformly flat.
- Finishing Touches
- Sand the surface to remove any tool marks.
- Apply a protective finish if desired.
Tips for Success
- Take Light Passes: Removing too much material at once can strain the router and lead to tear-out.
- Check Frequently: Use a straightedge to monitor progress and ensure flatness.
- Maintain Consistency: Keep the sled movement steady to avoid uneven spots.
By following these steps, you can restore your workbench to a perfectly flat state, enhancing the accuracy and quality of your woodworking projects.
Comments
Add comment