
Incra Tools – Upgrading Your Workflow: Router Tables
Posted by Siphesihle Hato in Uncategorized

In our last article on the Incra Tools – Upgrading Your Workflow: Crosscut Sleds we discussed the importance of evolving from working free-handedly to adding a permanent/semi-permanent fixed solution. We first used the incredibly helpful Incra Tools to make a coping sled for our table saws, now we wish to take on a larger and often a more complex table to create – the router table.
In designing a router table, one does follow a set number of conventions to build the most practical type of home router table. To help us with this, we will use the ever-popular Kreg Precision Router Table System (PRS1045) as a template to work from.

Router Table Components
Router Table Top:

Other than the supportive frame which holds our router table together, the router table top is the most part. The material that your router tabletop is made off will determine how strong your top can be, we always recommend using a solid board or thick Medium Density Fibre (MDF) board.
- Board thickness of about 38mm and above is recommended to accommodate the Incra T-Track grooves.
- Not only does the tabletop have to be strong but it needs to also be coated with a final finish which will allow wood pieces to easily glide along the tabletop, making the processes of pushing the wood against the router bit – a smooth one. We found that applying a few coats of beeswax and a final oil treatment does the trick.
Router Table Fence:
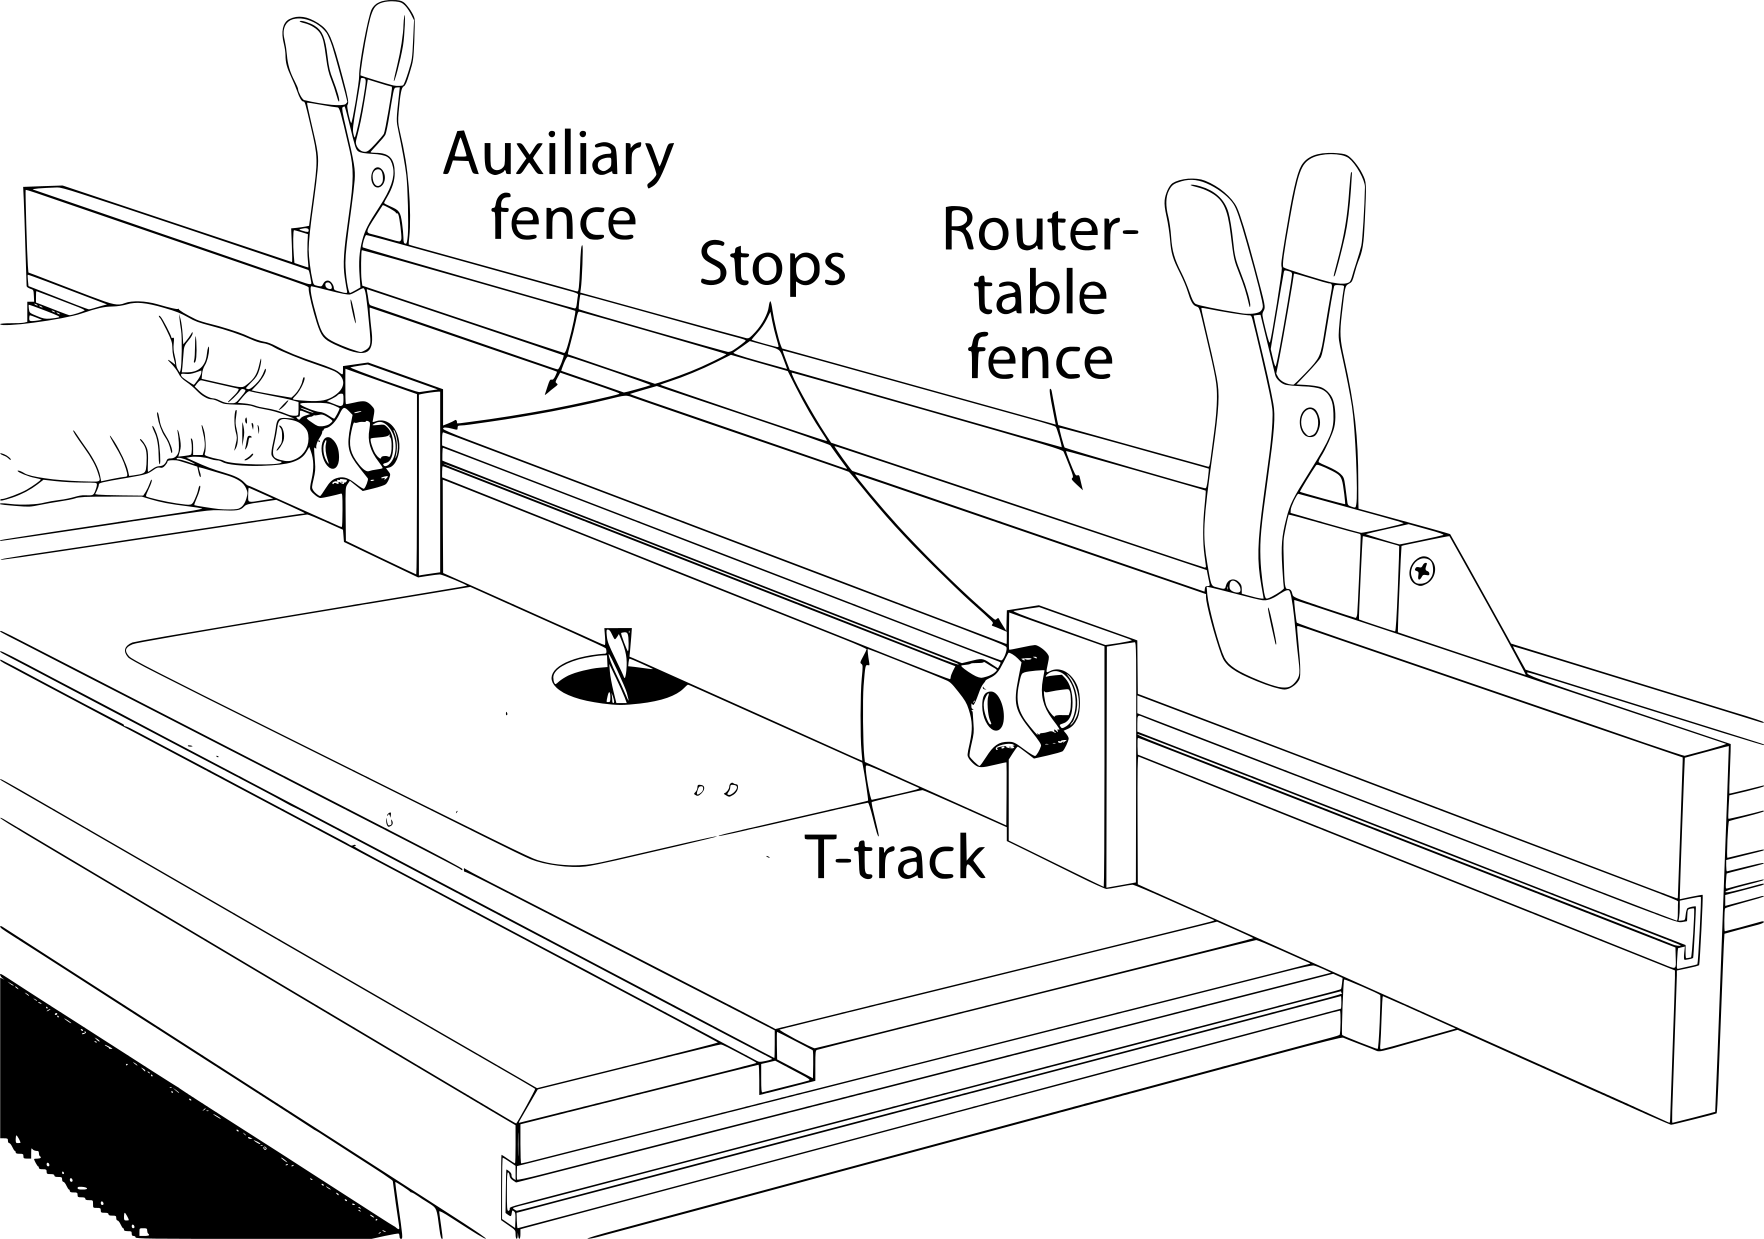 For the router table fence many have been known to use large & heavy wooden planks to create these fences. Although great for a temporary solution these often need a replacement very soon. We would suggest a two-part process, where you would use a solid timber plank which has a smooth finish on the face and reinforcing this with a joint aluminum tube about half the height.
- As with the tabletop, the table fence board will also need to accommodate the Incra T-track.
- About 30mm from the top part of the router table fence is where you will route the groove to fit your track. Once cut, you will then insert the first on your router table.
- This track will be used especially for holding your feather boards in place. Most feather boards currently available on the market fit snugly into this slot.
Here are a few feather board options to choose from: Feather Board
How you prefer to have your fence glide along the table is up to you. Whilst some woodworkers would prefer to cut two parallel grooves for the Incra Mitre Channels that the fence would glide along using the Incra Mitre Sliders. Although a much easier and efficient alternative, it is also a far more expensive choice to make. The traditional T-Glide system is often the fastest and most affordable to work with.
Luckily we can use more Incra Tools to make this T-Glide table fence system.
Simply screw on the appropriate length Incra T-Tracks along both sides of the table that the fence will run along.
Attach a perpendicular piece of timber to both ends of the fence. This piece should be perfectly square to the fence and table edge. Once attached, drill a 7mm hole in the bottom center position to allow the Incra T-Bolt to fit through the wooden piece and into the T-track. You will then use the knobs included in the Incra Knob Kit to tightly fix the fence into position whenever moved.

The router table inserts offered by companies like Kreg, Trend, and Woodriver are great and are almost all identical. Here are a few to choose from: Insert Plates
The inclusion of the reducing rings and a phenolic plate (for easy gliding) make the Kreg Precision Router Table Insert Plate, the best value for money. These are available as “undrilled” making them perfectly compatible with the router base plate holes which you will drill into the plate for mounting.
Installing these is pretty simple: use the router, combined with a template router bit to cut 12mm recess in which the plate will sit.
Mitre Gauge:
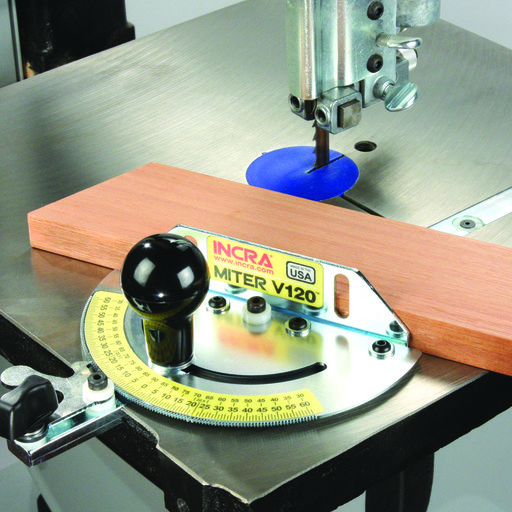
The addition of the Incra Mitre Gauge V120, compare to the processes above, is a fairly simple one. Just like we did with the Coping Sled, route a groove to insert the Incra Mitre Channel where you feel most comfortable. We suggest doing this about 30% away from the front edge of the table.
Once cut, screw-on the channel, slide in the Mitre Gauge…
And we have a solid Router Table!
Comments
Add comment