Crafting a Circle Sanding Jig with Your Disc Sander: A Step-by-Step Guide
Posted by Siphesihle Hato in Tips & Tricks
If you’re an avid woodworker or DIY enthusiast, you’ve probably encountered the challenge of sanding circles or curves. Using a disc sander to achieve precision in this task can be quite tricky, which is where a circle sanding jig comes in handy. Building your own jig allows you to create perfect circles with ease and accuracy. In this step-by-step guide, we’ll show you how to make a circle sanding jig using your disc sander.
Materials You’ll Need:
- Plywood or MDF board
- Wood glue
- Screws
- Ruler or measuring tape
- Pencil
- Disc sander
- Compass or a circle template
- Safety gear (goggles, ear protection, and dust mask)
Step 1: Safety First
Before you start any woodworking project, ensure you’re wearing the appropriate safety gear. This includes goggles to protect your eyes from debris, ear protection to shield against the noise, and a dust mask to avoid inhaling harmful particles.
Step 2: Measure and Cut the Base
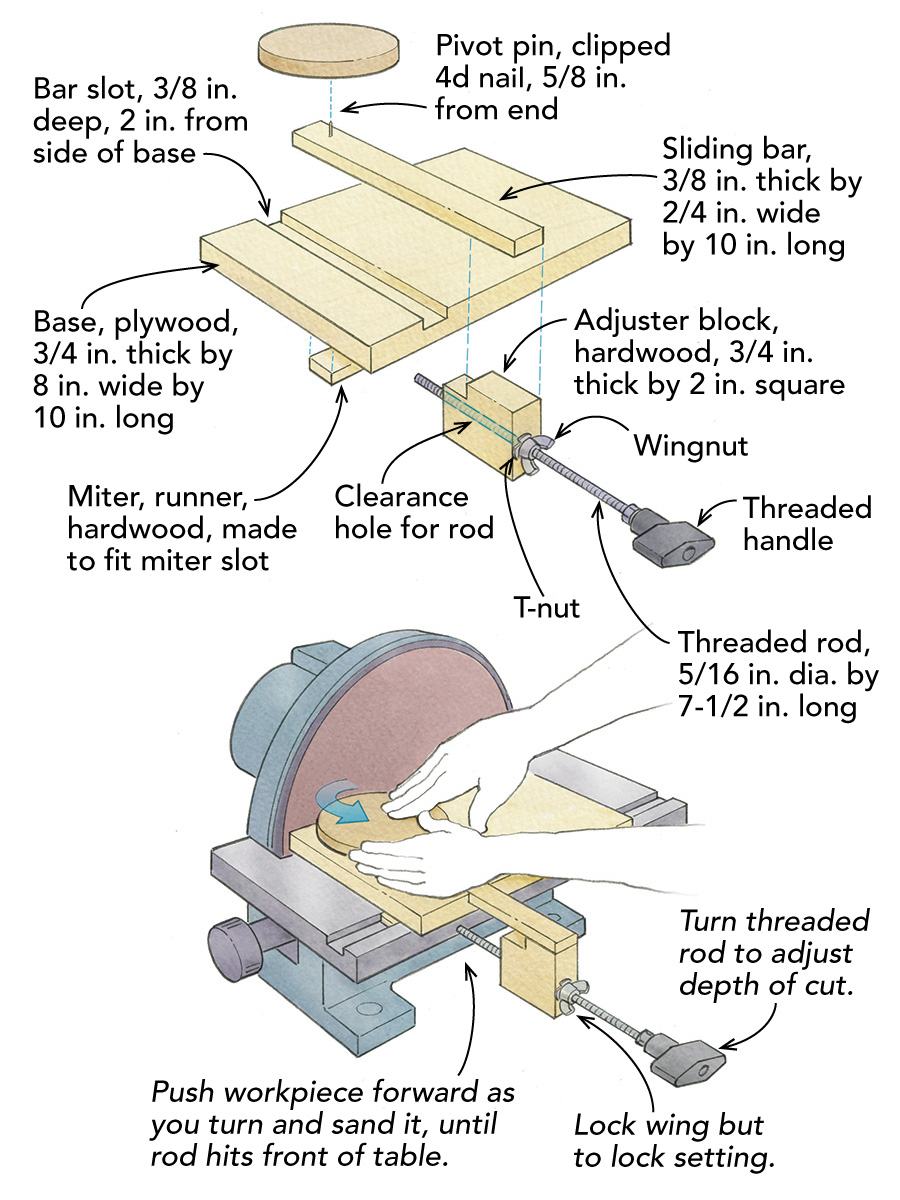
Begin by cutting a square piece of plywood or MDF as the base for your jig. The size of the base depends on the largest circle you intend to sand. Typically, a 12-inch by 12-inch square works well for most projects. Use a ruler or measuring tape to mark and cut the square to your desired size.
Step 3: Find the Jig’s Center
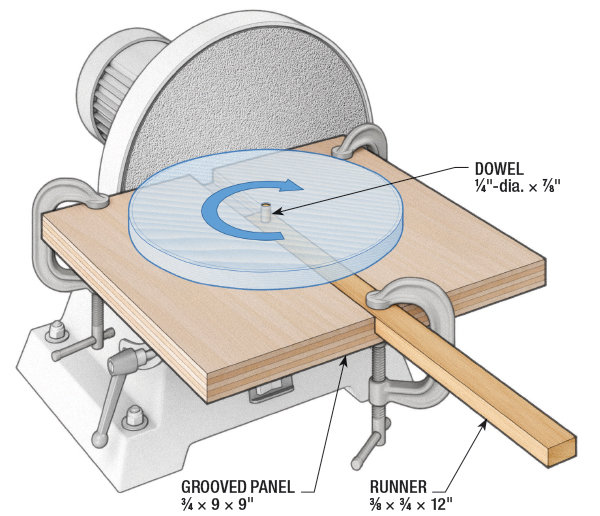
Locate the center of the base square. You can do this by drawing diagonal lines from corner to corner to create an “X” on the surface. Where the lines intersect is the center of your jig.
Step 4: Prepare the Pivot Point
To create a pivot point for your circle, take a small piece of wood and cut it into a 1-inch by 1-inch square. Place this square at the center of your base and screw it down firmly. This will be where you pivot your circle template or compass.
 Step 5: Create the Circle Template
If you have a specific circle size in mind, use a compass to draw the desired diameter on a separate piece of plywood or MDF. If not, you can create a template with various circles of different sizes for versatility. Once the circles are drawn, cut them out.
Step 6: Attach the Circle Template
Position the circle template over the pivot point on your base. Make sure it’s centered and align it with the pivot square. Use screws to secure the template to the pivot square. Ensure it’s fastened securely but still allows for easy rotation.
Step 7: Test and Adjust
Place your base on the disc sander and turn on the machine. Rotate the base while gently pressing it against the sander’s spinning disc. This will start to sand a perfect circle. Take your time and make adjustments as needed to achieve the desired circle size and smoothness.
Step 8: Sanding Your Workpiece
With your circle sanding jig complete, you can now use it to sand circles or curves on your workpieces. Simply place the jig over your material, adjust the size if necessary, and rotate the jig on the pivot point. The disc sander will do the rest, ensuring a precise and even finish.
By following these steps, you can create a reliable circle sanding jig for your disc sander. This simple and cost-effective solution allows you to achieve smooth and accurate curves and circles in your woodworking projects, making your finished pieces stand out with professional precision.
Comments
Add comment