Building Your Own Shaving Horse with Simple Materials
Posted by Siphesihle Hato in Encyclopedia of Woodworking, How To Guides
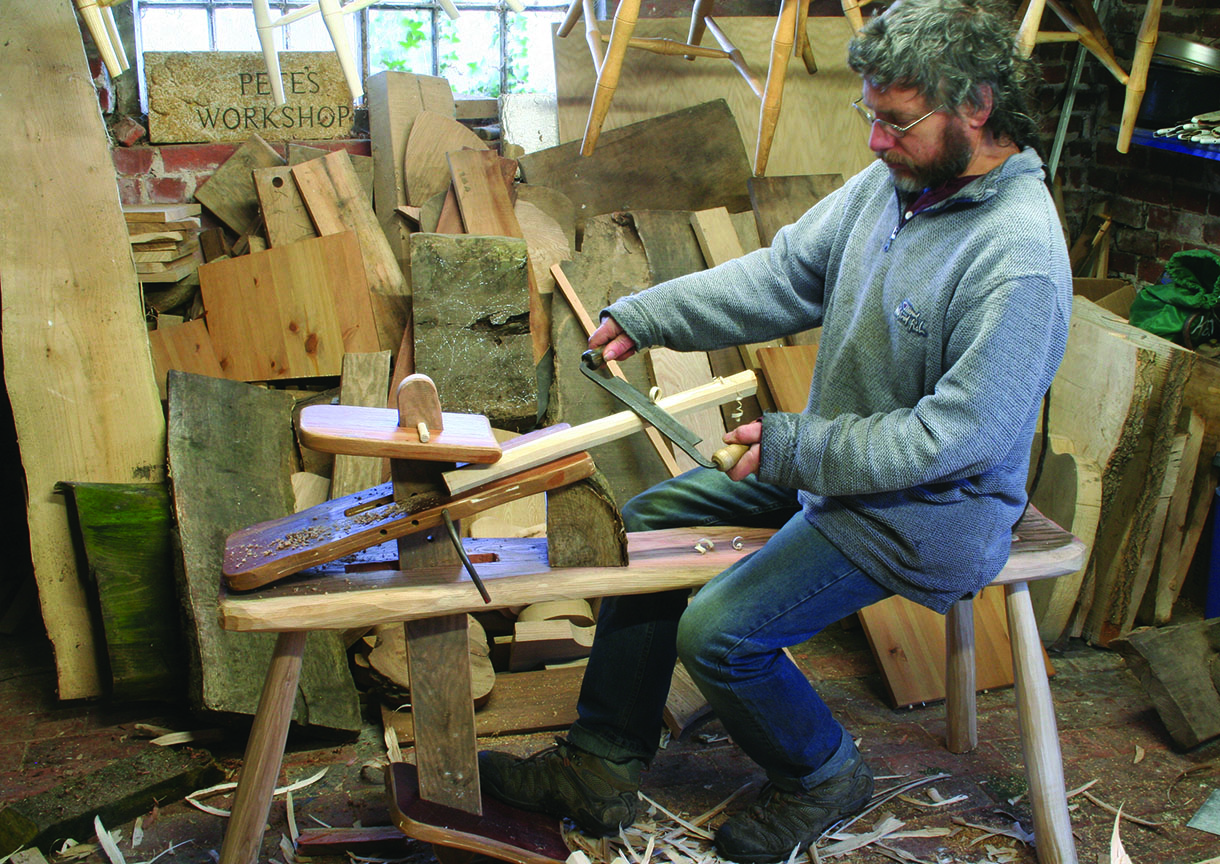
For woodworkers who appreciate the value of traditional hand tools, a shaving horse is an indispensable companion in the workshop. This versatile and straightforward piece of equipment provides stability and support for various woodworking tasks, especially when it comes to shaping and carving wood. Rather than purchasing an expensive shaving horse, why not embark on the fulfilling journey of crafting your own using simple materials?
Materials Needed
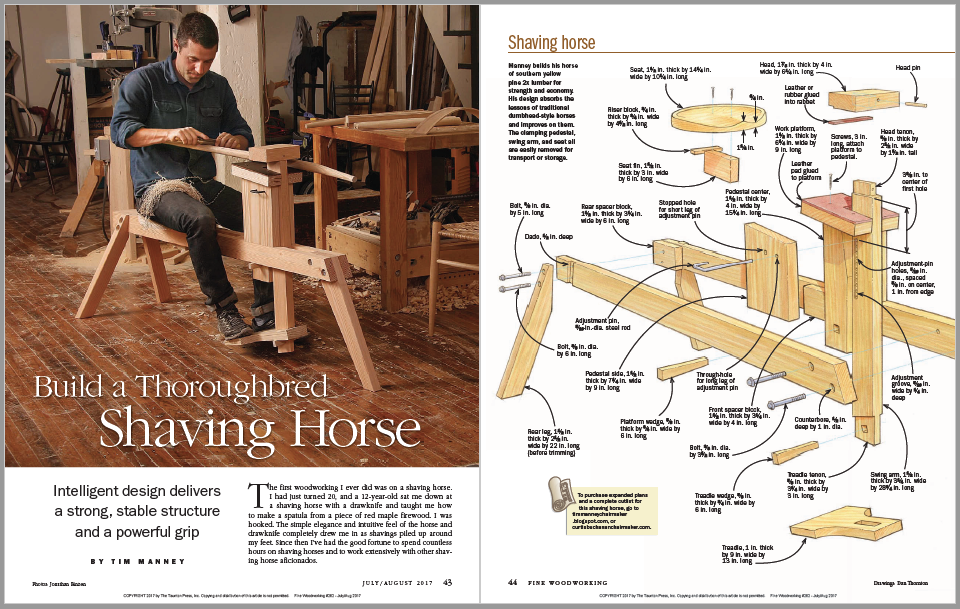
Creating your homemade shaving horse doesn’t require an extensive list of materials. Start by gathering sturdy lumber for the frame, such as 2x4s or repurposed hardwood. You’ll also need a piece of flat plywood for the seat, a strong dowel or metal rod for the pivot, and some screws to bring it all together. With these basic materials, you can build a functional shaving horse that will serve you well for years to come.
Design Considerations
Before diving into construction, take some time to consider the design of your shaving horse. Think about the height and width of the horse, ensuring that it suits your stature and the type of work you intend to perform. A well-designed shaving horse should allow you to exert force comfortably while providing ample support for the workpiece. Sketch out your design, taking into account the angles and dimensions that will best suit your needs.
Construction Steps
- Frame Assembly: Start by constructing the frame of the shaving horse using the 2x4s. Create an A-frame structure, ensuring that it’s sturdy and well-balanced. The angled legs should provide stability while allowing you to straddle the horse comfortably.
- Seat Attachment: Affix the flat plywood seat to the top of the frame, making sure it’s securely fastened. This will be the surface where you sit and apply pressure while working on your projects.
- Pivot Mechanism: Install the pivot point using a dowel or metal rod. This mechanism allows the head of the shaving horse to pivot up and down, providing the clamping force needed for woodworking tasks.
- Finishing Touches: Sand the edges and surfaces to ensure a smooth finish, reducing the risk of splinters. Consider adding a protective finish or paint to enhance the durability of your shaving horse.
Benefits of DIY
Building your own shaving horse not only saves you money but also allows you to customize it according to your preferences. As you work through the construction process, you’ll gain a deeper understanding of the tool and its mechanics, fostering a stronger connection to your craft.
- Find out more on building yourself a shaving horse: https://woodworkersinstitute.com/projects/2022/02/building-a-shave-horse-green-woodworking/
Crafting your own shaving horse with simple materials is a rewarding endeavor for any woodworker. Embrace the DIY spirit, personalize your design, and enjoy the satisfaction of creating a practical and efficient tool that will be a valuable asset in your woodworking journey.
Comments
Add comment