A Woodworker’s Guide to Making and Using Shooting Boards
Posted by Siphesihle Hato in Encyclopedia of Woodworking
In the pursuit of woodworking excellence, precision is paramount. One tool that can significantly enhance the accuracy of your woodworking projects is the shooting board. While shooting boards may seem like a simple accessory, their impact on creating clean, square edges and precise angles cannot be overstated. In this guide, we’ll explore how to make and effectively use shooting boards to elevate your woodworking craftsmanship.
Crafting Your Shooting Board
Materials Needed:
- Plywood or MDF Board: Select a sturdy and flat piece for the base of your shooting board.
- Hardwood Strip: Use a straight and durable hardwood piece for the fence of the shooting board.
- Clamps: Ensure a secure grip during use.
- Saw and Plane: Essential tools for shaping and refining the shooting board components.
- Screws and Screwdriver: To fasten the fence securely to the base.
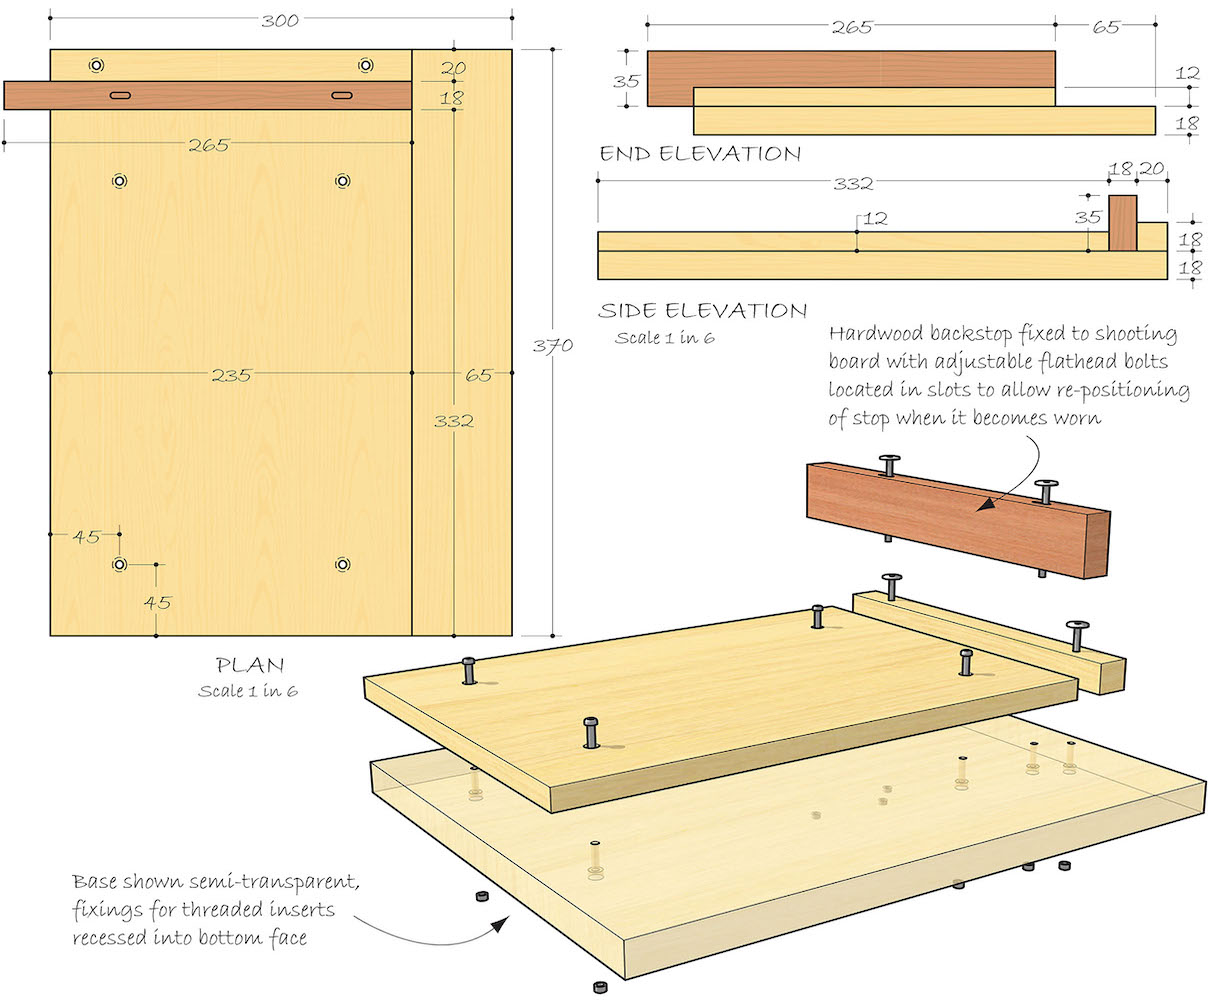
Construction Steps:
- Base Assembly: Cut the plywood or MDF to the desired size for the shooting board base. Sand the surface to ensure it’s smooth.
- Fence Construction: Cut a straight and true hardwood strip to serve as the fence. Attach it perpendicular to the base, creating a 90-degree angle.
- Alignment: Use a square to ensure the fence is perfectly perpendicular to the base. Secure it in place with screws, making adjustments as necessary.
- Testing: Before finalizing, test the shooting board with a known straight edge to confirm accuracy. Make any adjustments to the fence if needed.
Using Your Shooting Board
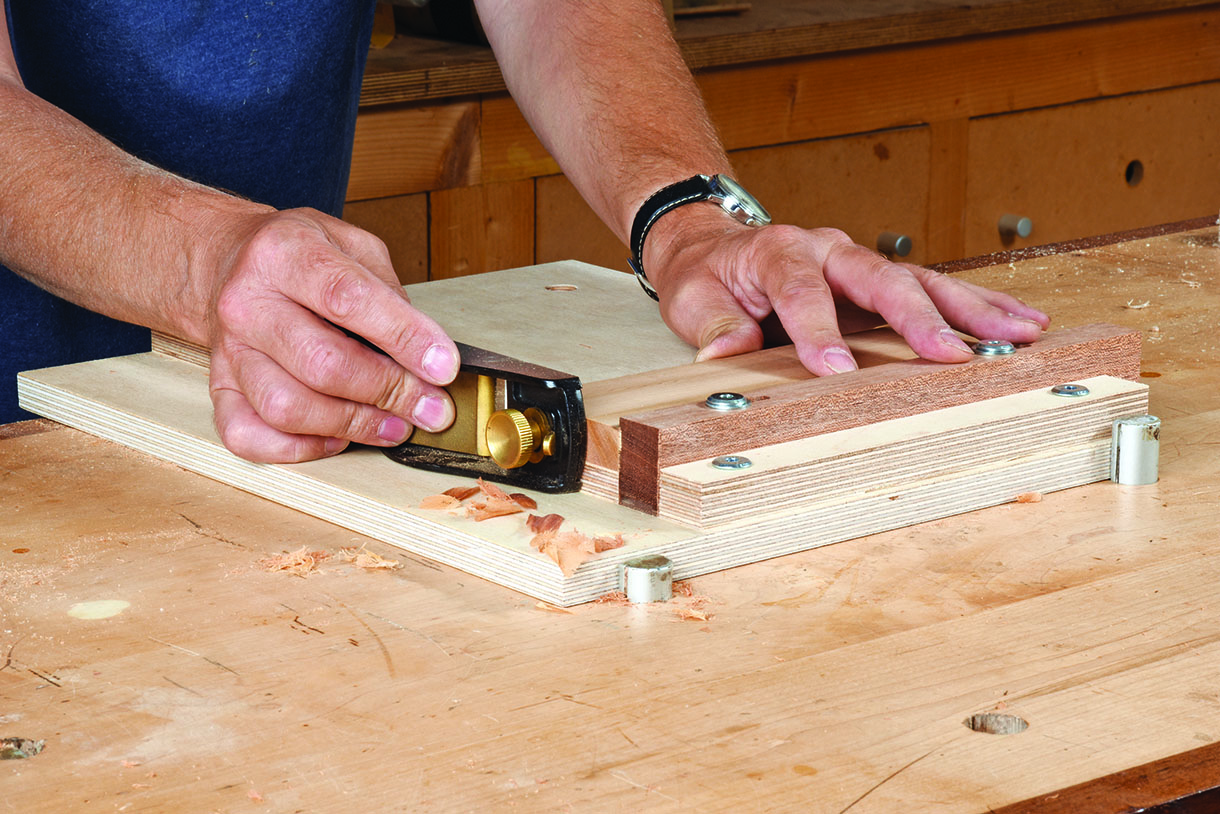
Squaring Edges:
- Place the Workpiece: Position the piece you want to square against the fence, ensuring the edge to be squared aligns with the shooting board’s edge.
- Secure with Clamps: Use clamps to secure the workpiece firmly against the shooting board.
- Plane or Saw: Run a hand plane or saw along the shooting board’s edge, allowing the fence to guide the tool and produce a perfectly square edge.
Trimming Angles:
- Angle Adjustment: To trim an angle, adjust the workpiece against the shooting board’s fence to the desired angle.
- Secure and Trim: Clamp the workpiece securely, and use a plane or saw to trim, allowing the shooting board to guide the tool for precise angles.
Benefits of Using Shooting Boards
- Precision: Shooting boards ensure accurate and square edges, enhancing the overall quality of your woodworking projects.
- Versatility: Ideal for squaring edges, trimming angles, and creating precise joinery.
- Control: Offers control and stability, especially when working with smaller or delicate pieces.
In the world of woodworking, where precision is revered, a well-crafted shooting board becomes an invaluable companion. By understanding how to make and use this simple yet powerful tool, you’ll elevate the quality of your projects and bring a new level of accuracy to your craftsmanship. Embrace the shooting board as an essential component of your workshop, and witness the transformation it brings to your woodworking endeavors.
Comments
Add comment