


Joinery: Dovetails

JOINERY: DOVETAILS
by AM de Jager
1.1 Introduction
Figure 1: Dovetail Joint on jewellery box
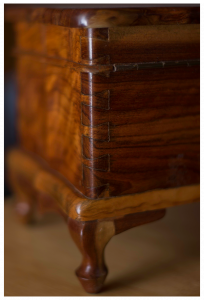
The dovetail joint (also called the swallow-tail joint or fantail joint) combines elegance with strength and is the hallmark of fine woodworking and joinery. It joins two boards at a right angle as found in any type of box construction: drawers, cabinets, chests, utility boxes and so on. The dovetail joint on a jewellery box is shown in Figure 1.
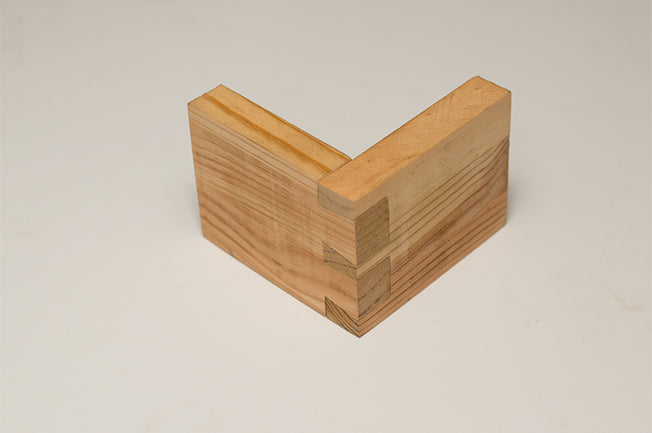
The joint’s name is derived from the shape of the interlocking parts. A series of flaring sections (called tails) is cut into the end of the one board (called the tail board) while a series of pins is cut into the mating board (called the pin board). The recesses between the pins accept the tails to create a mechanical interlock. This is shown in Figure 2.
Mechanical fasteners (pins, nails, screws) are not required and the joint’s strength is provided through the interlocking nature of the two boards as well as glue. The glue joint is extremely strong due to the long-grain to long grain interface between the tails and pins.
The dovetail joint is very similar to the box joint. In fact, the box joint can be seen as a dovetail joint where the slope of the tails has been reduced to 0°. It offers similar levels of strength due to the high number of long-grain to long-grain glue surfaces.

1.2 Types
There are a number of variations of the dovetail joint:
- 1.2.1 Through Dovetail
The through dovetail is the most common variant and is characterised by the fact that the end grain of both boards are visible after the joint is assembled.

- 1.2.2 Half-Blind Dovetail
The half-blind dovetail is used when the end grain of the tail board must not be visible when the joint is assembled. This is achieved by not cutting the tail recesses all the way through the pin board. The most common application is in drawer construction to achieve a strong joint without having to add a false front to the drawer to hide the tail board’s end grain.

1.2.3 Sliding
Where the through dovetail and half-blind dovetail joints are used to join two boards at their ends, the sliding dovetail is used to join one board to another along its length. It is similar in application to the housing (or dado) joint, but provides additional mechanical strength through the interlock created by the tapered shape of the dovetail.

1.2.4 Full-Blind Dovetail
The full-blind dovetail (or full-blind mitred dovetail/secret mitred dovetail) is used when the strength of a dovetail joint is required without it being visible from the outside after the joint has been assembled.

1.3 Advantages/Disadvantages
Advantages
- Very strong
- Multiple long-grain to long-grain glue surfaces
- Strong interlock
- Resistant to racking
- Elegant appearance
Disadvantages
- Difficult to cut compared to alternatives.
1.4 Procedure
There are a number of ways to create dovetails and they can be classified according to the tools used. The three main categories are traditional/hand cut (using hand tools), hybrid (using a combination of power tools and hand tools) and finally the jig-based method (using a router with a dovetail bit and a special jig). The high-end router jigs produce very precise and repeatable results but they tend to be outside the budget of the typical hobby woodworker and will not be discussed in the remainder of this article.
The traditional method only makes use of hand tools while the hybrid method incorporates the use of power tools – specifically for the cutting tasks. The following sequence of steps outline the procedure for cutting through dovetails without using any specialised tools. The process for half-blind dovetails is very similar.
Step 1: Marking the tails

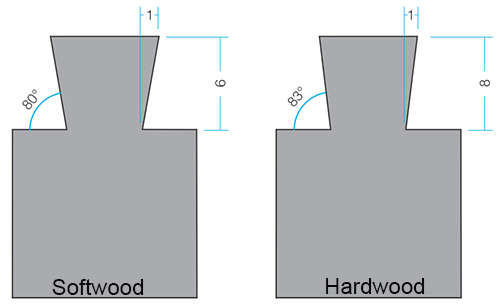
Mark the tails using a bevel gauge. For softwood a 1:6 slope is typically used while a 1:8 slope is used for hardwoods. This roughly translates to a 10° slope for softwoods and a 7° slope for hardwoods (See Figure 8). The horizontal line is positioned to indicate the thickness of the pin board and can be marked using a marking gauge. Clearly mark the waste areas that will be removed.
Dovetail marking templates and a scriber can be used instead of a bevel gauge and mechanical pencil.
Step 2: Cutting the tails

Secure the board and cut the tails on the waste side of the marked lines. In this instance a fine pitched dovetail saw was used, but a band saw or table saw can also be used.
Step 3: Removing the waste

Remove the waste marked in Step 1. In this instance a dovetail saw was used to remove the waste on the edges, while a coping saw was using the remove the waste between tails. Cut on the waste side of the lines.
A band saw or table saw can be used to remove the waste on the edges while a fret saw or scroll saw can be used to remove the waste between tails. On thin stock it can also be removed with a chisel by paring away from both sides of the board.
Step 4: Cleaning up

Use sharp chisels to chop out any remaining waste and pare down to the marked lines.
Step 5: Marking the pins

Position the tail board on the edge of the pin board. Mark out the pins using a sharp pencil or a marking knife. Transfer these lines to the faces of the pin board using a square and clearly mark the waste areas. The horizontal line is positioned to indicate the thickness of the tail board and can be marked using a marking gauge.
Step 6: Cutting the pins

Secure the board and cut the pins on the waste side of the marked lines. In this instance a fine pitched dovetail saw was used, but a band saw or table saw can be used.
Step 8: Cleaning up

Use sharp chisels to chop out any remaining waste and pare down to the marked lines. A sacrificial board is used under the work piece to protect the work surface.
Step 9: Adjustment and assembly
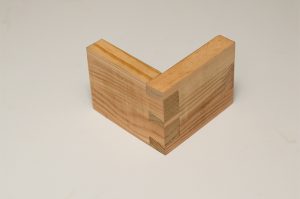
Use a chisel to make adjustments where necessary to create a tight joint. Make sure the corners of each tail and pin has been cleaned thoroughly. Pay special attention to keep the outer edges sharp and do not apply too much force when joining the two parts – especially when making narrow pins.
