Float It
Posted by jasonmain in Project Plans
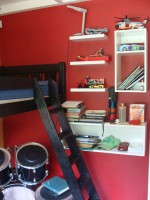
There are many ways to create shelves, but few of them are aesthetically pleasing. A modern solution is floating shelves. Make your own with this step-by-step guide.
By Carel Ballack
Floating shelves are a contemporary and practical way of storing various household goods. You can use this method to create different lengths of shelves and place them where needed, such as in the bathroom, kitchen, bedroom or lounge. Follow these steps to create your own:
Step-by-step:
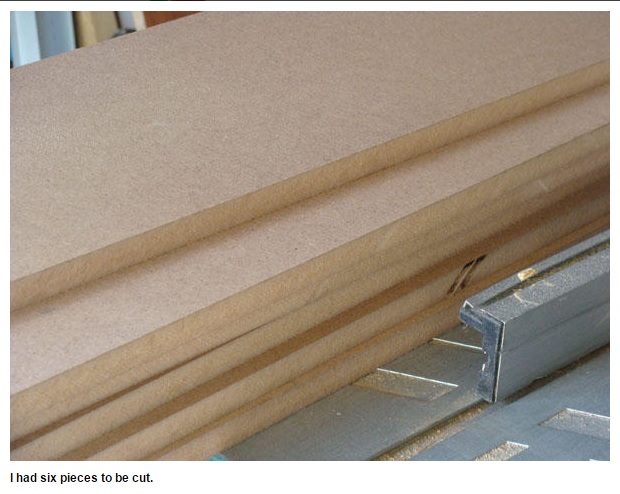
Step 1: Cut the superwood to size. If you don’t have the correct equipment for this, you can hand your cutting list in at the wood supplier and they will be able to cut it for free, or at a small fee.
The shelves I am making are 200 x 450mm in size as a finished product. The superwood needs to be cut to 210 x 460mm for a start. I will cut them down to size once they have been glued. For this exercise I had six pieces to be cut.
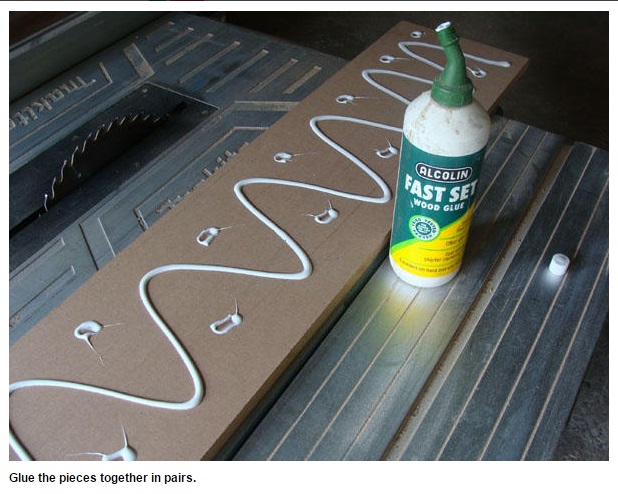
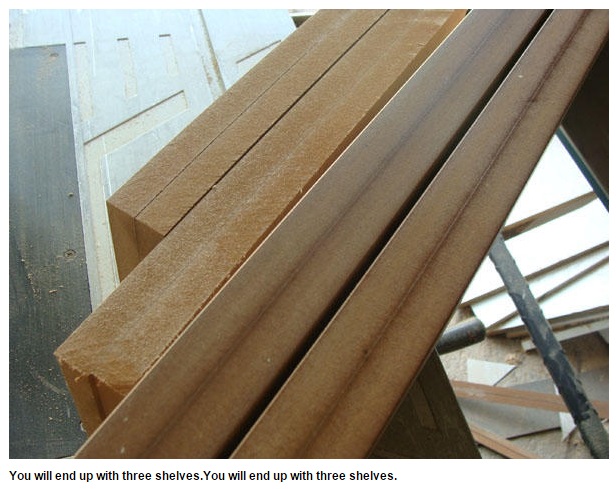
Step 2: Glue the pieces together in pairs to make the shelves thicker. You will end up with three shelves.
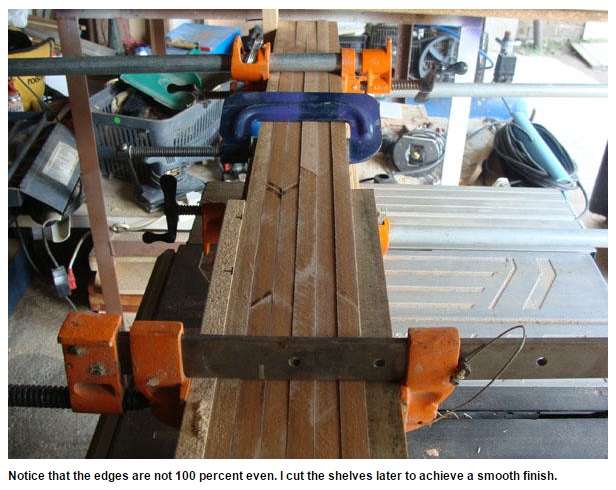
Step 3: I glued and clamped all the pieces at the same time. Notice that the edges are not 100 percent even. I will cut the shelves later in the process to achieve a smooth edge.
Step 4: Once the glue has set/dried, cut the excess 5mm off on each side – this will give you a very smooth edge with minimal sanding and planing required prior to painting.
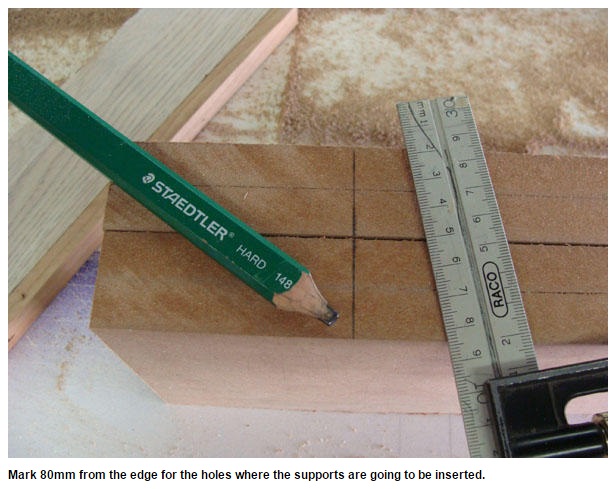
Step 5: Put the shelves on their sides, mark 80mm from the edge for the holes where the supports are going to be inserted. If you use 8mm rawl bolts and handy rod, drill the first hole 20mm in size and then use a Speedbor bit 10-12mm drilled into the centre of the 20mm hole.
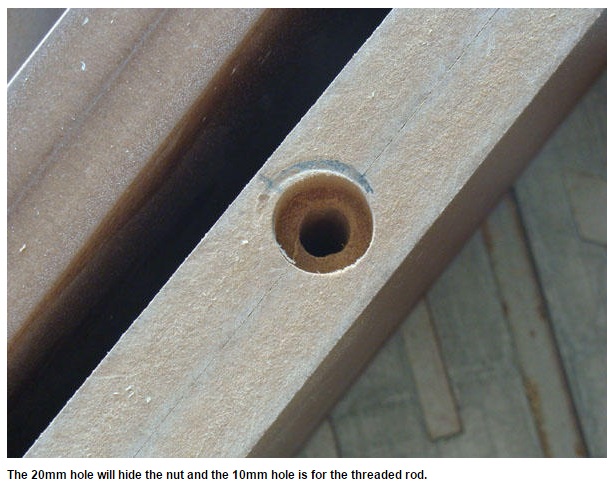
The 20mm hole will hide the nut and the 10mm hole is for the threaded rod. Drill as deep as you can without going all the way through.

Step 6: Keep the drill bit as straight as possible, as this will make the fitting of the shelf easier. To the left is the 20mm outer hole with the 10mm inner hole. This is clearly visible in the pictures.
Step 7: Paint the edges of the shelves with sanding sealer. Leave this to dry properly, sand and paint the complete shelf in the colour of your choice. Using sanding sealer first gives it a smooth finish all round.
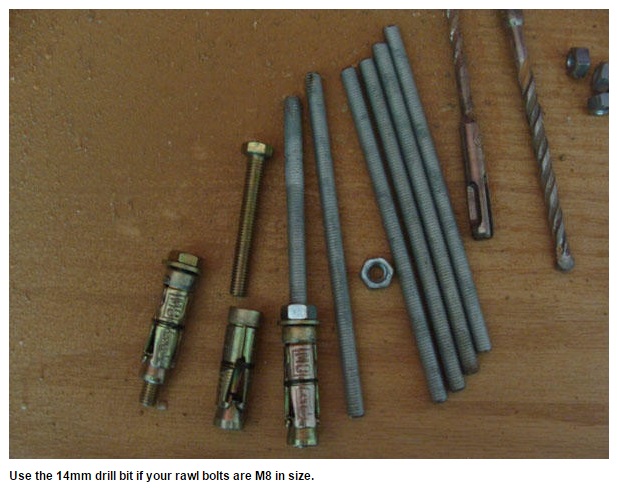
Step 8: Measure the distance between the holes on the shelf. Transfer the same distances onto a level line on the wall where you want the shelf to be situated. Again, drill twice, start with a pilot 6mm drill bit as it is easier to achieve an accurate hole, then use the 14mm drill bit if your rawl bolts are M8 in size.

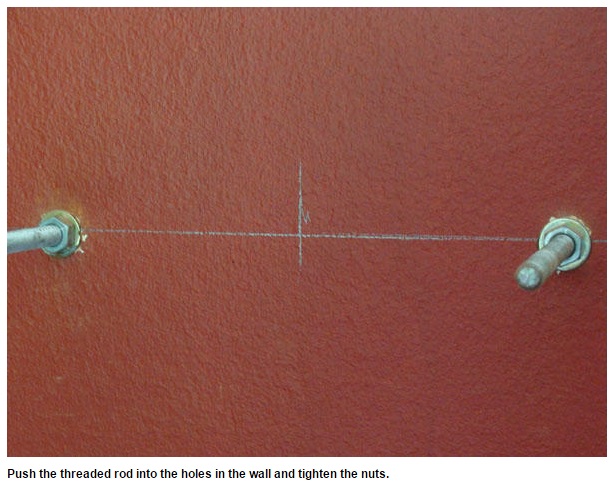
Step 9: Take a standard rawl bolt and remove the bolt. Take a piece of threaded bar/handy rod approximately 150mm in length and screw it into the place where the bolts were removed. Screw an M8 nut up against the rawl bolt. You now have what is known as a ‘projection rawl bolt’.
Step 10: Push them into the holes in the wall and tighten the nuts. You should have two pieces of threaded bar sticking out of the wall. The distance between the two bolts should be equal to the distance of the holes in your shelf.
Step 11: Now simply slide your shelf onto the bolts, and there you have it, your own floating shelf.

![]()
Comments
Add comment