Drop-down Workbench or Craft Table
Posted by Tanya Schutte in Project Plans
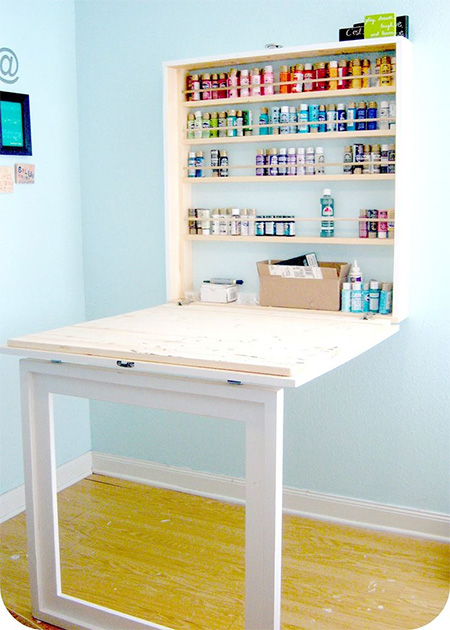
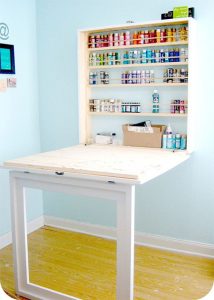
Quite a few readers have asked me to make a drop-down craft table similar to the one shown below. I decided to modify the design slightly to make a simple drop-down table that can be used as a craft table or workbench.
While there is nothing wrong with the original design found on bubblewrappd, the instructions are sketchy and in Imperial measurements, plus the table top itself is not well supported. I have gone for a solid design with additional support on the support leg, and you can quite easily make the front face (support) into a chalkboard memo or notice board, add some patterned wallpaper for instant wall art, or add moulding to make a picture frame.
The basic design incorporates a wall-mounted cabinet where the front panel is hinged to drop-down and support itself on the base leg.
![]()
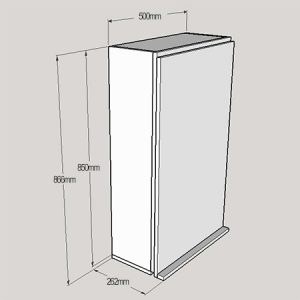
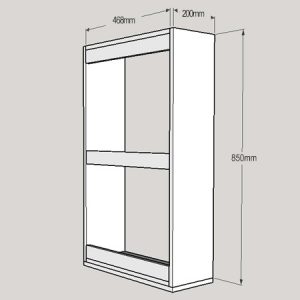
Use 16mm MDF or marine plywood to make the fold-down table:
- 2 of 200 x 468mm – cabinet top and base
- 1 of 200 x 500mm – cabinet bottom
- 2 of 200 x 850mm – cabinet sides
- 3 of 50 x 468mm – cabinet wall mountings
- 2 of 500 x 850mm – top and support leg
- 1 of 30 x 500mm – foot
- 2 of 500mm lengths piano hinge and 16mm screws
- 2 hook latches for top of cabinet
- 4 x 35mm screws
TOOLS:
- Drill / Driver plus assorted bits
- Countersink bit
- Tape measure and pencil
- Spirit level
![]()
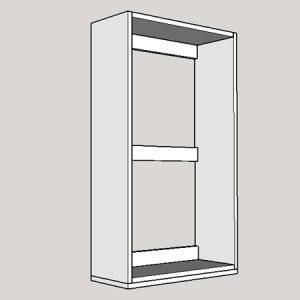
Make the cabinet
Assemble the cabinet as shown in the diagram below. Drill 3mm countersunk pilot holes and use 4 x 35mm screws to join.
All the holes can be covered up by using wood filler or screw caps once you have finished.
Mount the cabinet onto the wall through the mounting panels at the back of the cabinet. Use nylon wall plugs and screws to ensure the cabinet is secure. The support leg is 850mm high plus 4mm for the hinge, so the base of the cabinet needs to line up with this for a stable assembly when the table is in use.
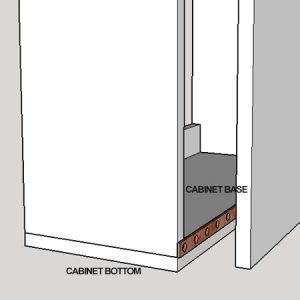
Attach the front panel
Use 16mm screws to attach a piano hinge along the bottom of the front panel / cabinet front. Have someone on hand to hold the panel in place while you secure to the cabinet base (not cabinet bottom) with 30mm screws.
Attach the support leg
Glue and screw the foot onto the bottom of the support leg for added stability. Attach the piano hinge to the top edge of the support leg using 35mm screws and the attach to the cabinet front using 16mm screws.
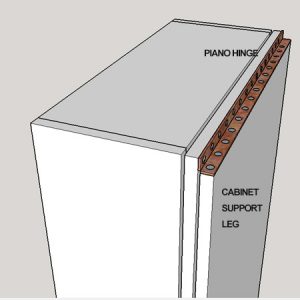
Attach a couple of hook latches on top of the cabinet, with eyes in the top edge of the cabinet front, to hold the front assembly in place when not in use.
![]()
Comments
Add comment