DIY Bedside Cabinet
Posted by jasonmain in Project Plans
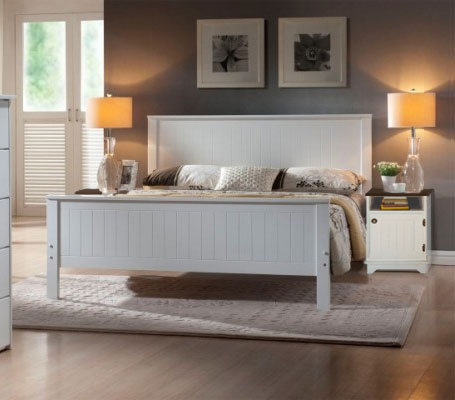
We recently had a jam-packed weekend at DIY Divas, where everyone made a bedside cabinet. The workshop was such a success that I wanted to share the project with you. The bedside cabinet is made using PG Bison 16mm SupaWood with a pine top and it will cost around R800 for two units, which is extremely affordable if you think how much you would spend to buy a ready-made bedside cabinet.
You will need:
Materials:
- 1 of 20 x 400 x 450mm laminated pine – top
- 1 of 16 x 400 x 450mm MDF – base
- 2 of 16 x 440 x 550mm MDF – sides
- 1 of 16 x 338 x 435mm MDF – shelf
- 1 of 16 x 330 x 430mm MDF – door
- 2 of 16 x 100 x 434mm MDF – side apron
- 1 of 16 x 100 x 370mm MDF – front apron
- 3 butt hinges
- 1 knob or handle
- Wood glue
- Wood filler
- 4 plastic corner brackets
- 8 steel angle braces – more if not using a pockethole jig
- 240-grit sandpaper
TOOLS:
- Drill/Driver and assorted bits
- Countersink bit
- Orbital sander
- Jigsaw and clean-cut blade
- Tape measure and pencil
- Pockethole jig
- Ruler
Here’s how:
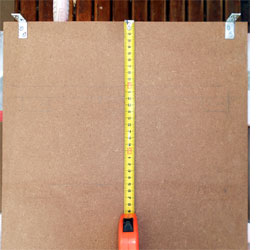
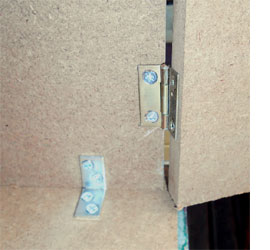
Before you assemble all the cut pieces there is a little preparation that has to be done. Mount the angle braces at the top and bottom of both sides. Position the angle braces at least 10mm in from the front and back edge. You will use these braces to attach the top and bottom sections. Measure down 150mm from the top and draw a line on both side sections.
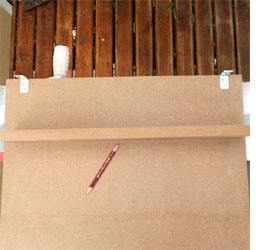
Below the draw line position a piece of 16mm board and draw a line underneath this. This is the mark for mounting the shelf.
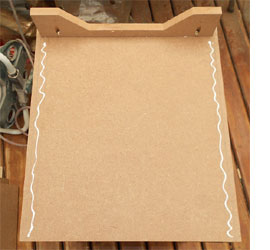
On the top [A] and bottom [B] sections measure in 15mm from the sides and front and draw a line. Use this mark to attach the sides to the top and bottom with angle braces and 16mm screws. Repeat these marks on the underside of the bottom for mounting the base aprons.
NOTE: On all sections use a small bead of wood glue.
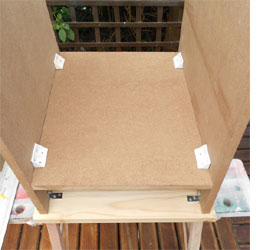
Now it’s time to mount the shelf. Use the previously drawn lines to position the shelf and attach to the sides with corner brackets. You can also use corner braces if you prefer, or even by drilling through the sides, countersinking and filling the holes before painting.
Cut out a design on the front apron using a jigsaw. Using the previously draw guides, attach the front apron with either a pockethole jig or using angle braces.
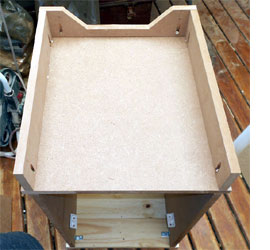
Mount the side aprons in exactly the same way. Now you can turn the unit right-side up.
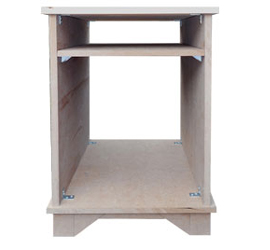
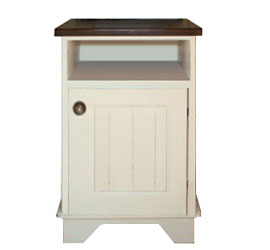
This is how your bedside cabinet should look like at this stage of the project.
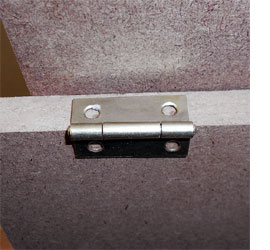
On one edge of the door section place the hinges 100mm up from the top and bottom edge and use a pencil to mark the screw holes.
NOTE: It’s important when mounting butt hinges to make sure that the barrel (centre section) is over the edge, as mounting incorrectly will mean the hinges don’t work as they should.
Drill pilot holes where you marked. Use a drill bit that is a mm smaller than the screw diameter. For example: If the screws are 3mm in diameter – use a 2mm drill bit for the pilot hole.
Have someone hold the door so that you can mark, drill pilot holes and drive in screws to mount the hinges to the side of the cabinet. Alternatively, place the cabinet down on the side where the hinges are to be mounted. This makes it easier to hold in place as you drive in screws.
DIY TIP
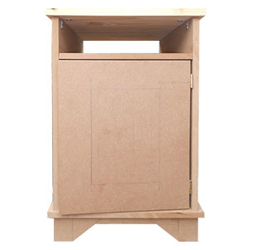
Make sure that you position the door nicely within the opening, with gaps at the top and bottom of the door. If you don’t leave a gap at the bottom of the door, it won’t open or close properly and will scrap away any finish.

To finish off the bedside cabinet use Woodoc 10 with added stain concentrate in your choice of colour to stain and seal the top. The cabinet was painted with three coats of Modo low-sheet acrylic- white – available at Builders Warehouse. The painted finish was sanded with 400-grit sandpaper and then wiped down with Woodoc antique wax.
![]()
Comments
Add comment