
Comfortable chaise for relaxing on a deck or patio
Posted by Angie Hodge in Project Plans
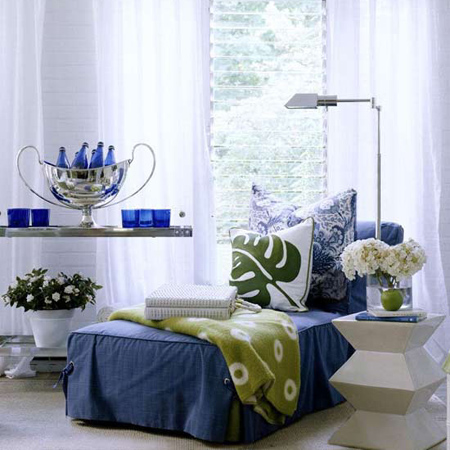
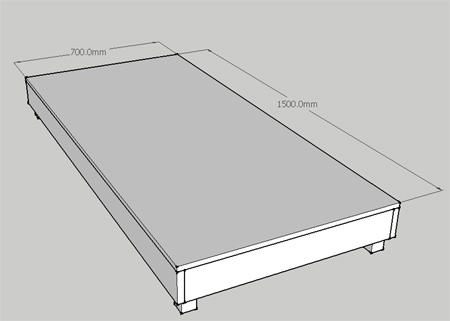
I love to stretch out on a hot summer’s day with a good book and a cool glass of wine. This comfortable chaise is simply a basic pine frame upholstered with a layer of foam and wrapped in fabric. Dress it up with colourful plain or patterned cushions and it’s perfect for a sunroom, covered patio or deck. Leave the cover loose so that it can be popped into the washing machine whenever necessary.

2 of PAR pine 22 x 100 x 1500mm – base long sides
2 of PAR pine – 22 x 100 x 660mm – base short sides
4 of PAR pine 44 x 44 x – 150mm – base legs
1 of BisonBord 700 x 1500mm – base top
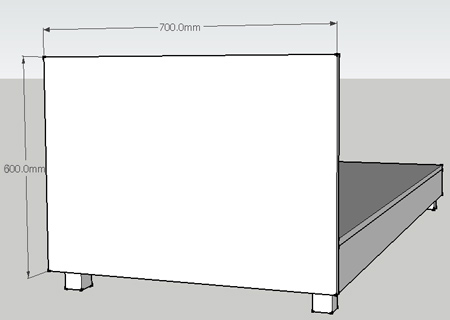
1 of BisonBord 600 x 700mm – headboard
6 x 50mm cut screws (smooth shank)
4 x 30mm cut screws (smooth shank)
Wood glue
Pattex PL700 or glue suitable for use on foam
Medium density foam 700 x 1500mm & 384 x 700 x 100mm thick
TOOLS:
Pockethole Jig (or steel brackets)
Drill/Driver plus assorted drill and screw bits
Countersink bit and 12 or 16mm spade bit
Bosch Orbital Sander plus 180-grit sanding pads


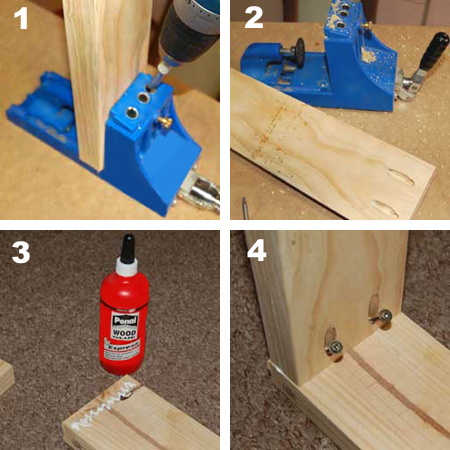
1. Drill pocketholes on the inside of the short pieces for the base.
2. A pockethole jig is absolutely fantastic and, if you intend to take DIY seriously, is definitely a must-have tool for your workshop. If you don’t have a pockethole jig you can substitute with 2 steel corner braces/brackets per corner to attach the base short sides to the base long sides.
3. All joins in this project have a bead of wood glue for extra strength.
4. Use 4 x 30mm cut screws to attach the base short sides to the base long sides.
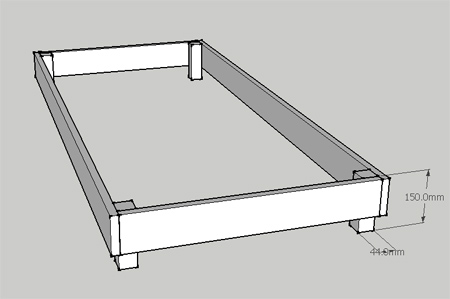
5. With all the sides joined to create the base frame it’s now time to add the legs.
6. The legs are fixed to the inside corners of the bed, and are screwed through the legs into the sides.
7. To allow the screw to have more wood to ‘bite’ into, use a spade bit to drill out to a depth of approximately 10mm. There are two holes in each leg – on a different face and at a different position so that the screws will not jam into each other.
8. Add wood glue to the top of the legs and then position them on the inside of the frame. Screw firmly to the side of the frame with 6 x 50mm screws as shown.
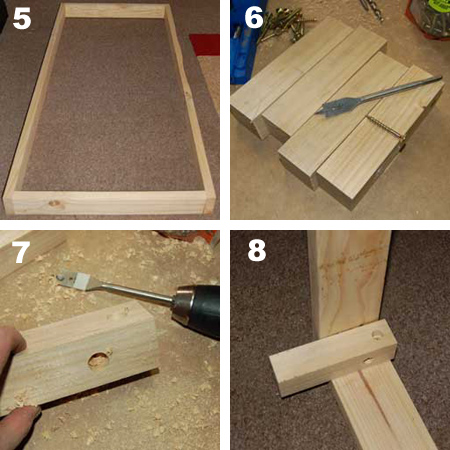
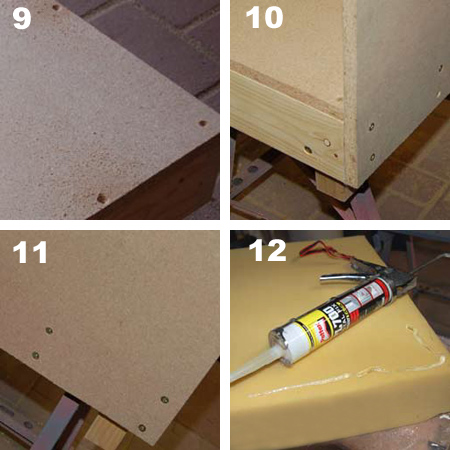
9. To attach the BisonBord top to the base, use a countersink bit before driving in screws so that any screw heads are below the surface of the board. Attach with 4 x 30mm cut screws.
10. Countersink holes along the bottom of the headboard – 2 rows of 5 holes across.
11. Screw the headboard to the base frame with 6 x 50mm cut screws into the frame legs and 4 x 30mm cut screws into the frame sides.
12. Glue the cut piece of foam onto the headboard using Pattex PL700 or adhesive suitable for use on foam.
Fabric cover
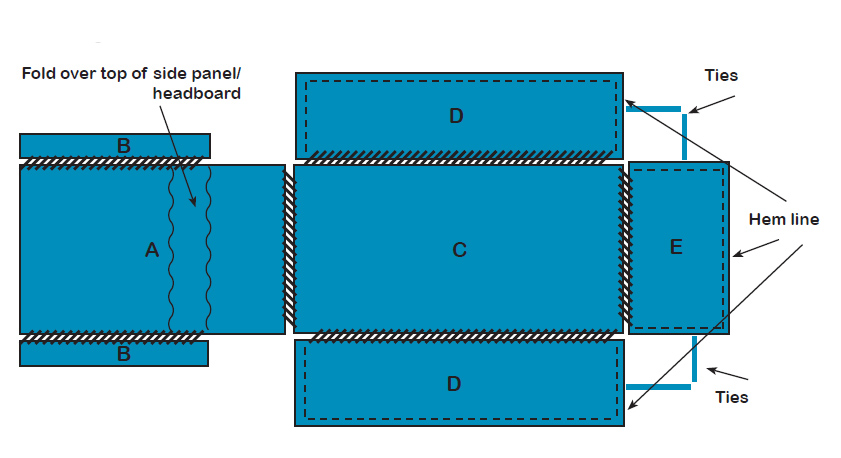
1. Panel A covers the entire front and back of the headboard. Sew B to A as shown below.
2. Main seat – Sew a 20mm hem on D and E. With right sides facing, sew D to C on the sides and E to C along the bottom. Attach ties to side of D and E as shown below.
3. With right sides facing, join together A and C.
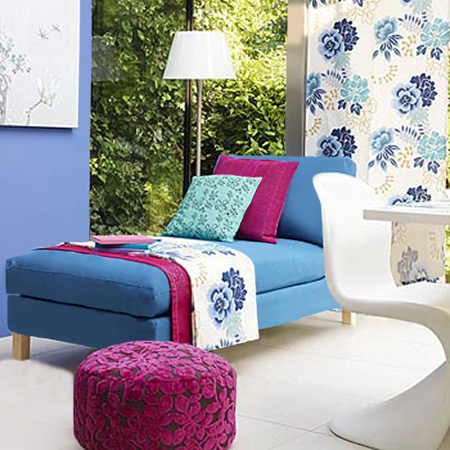
Here’s another example of the same chaise design with upholstered base and fabric-wrapped foam.
![]()
Comments
Add comment